🛠️ Protect your drive, upgrade your ride — DIY CV boot perfection!
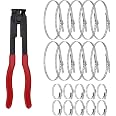
The Bailcast CVS18 Universal Split Constant Velocity Joint Gaiter Boot Replacement Kit offers a versatile, durable solution for protecting your vehicle’s CV joints. Designed to fit a wide range of cars and light commercial vehicles, this kit includes everything needed for a quick, professional-grade DIY repair. Its abrasion- and temperature-resistant materials ensure long-lasting protection, while the split boot design with included adhesive guarantees a secure, leak-proof fit.
| Manufacturer | Bailcast |
| Brand | Bailcast |
| Model | CVS18 |
| Item Weight | 8.4 ounces |
| Package Dimensions | 7.6 x 5.12 x 4.13 inches |
| Item model number | CVS18 |
| Manufacturer Part Number | CVS18 |
J**I
Best Seller For A Reason
Having accidentally torched my CV boot when removing the wheel bearing for replacement, I had now entered the realm of CV boot replacements. Thanks to amazon, just about anything and everything can be found and within a good 10 minutes of browsing, this one was the winner for my needs. I did not want to deal with the hassle of removing the knuckle from the control arm or strut from the knuckle just to get the CV axle out. My job application simply required a new outer boot and had not been driven to ruin the axle or lack of grease as some may have experienced. On installation of the boot, I had to trim the last layer off as well as the top layer to get an old boot size fit. I wish I had been more careful with the glue as it is VERY fast drying and sticky. It was also burn your eyes from the vapors it produces similar to peeling onions. Gloves are provided that smell like balloons but they will do the job. I accidentally got some glue on my fingers though and nearly ruined the job due to being distracted by a nasty finger/glue dried up scenario. WEAR THE GLOVES and TAKE YOUR TIME. Glue each layer at a time, pinching it shut and don't worry if there is overspill as you will actually want an extra layer oozing across the split lines to ensure long term support. With all my mistakes, I barely had enough glue but I had messed up so without the mess up, I imagine having half the amount of glue remaining. Gen 2 Prius fix is complete and was able to use one of the 2 boot clamps. The smaller would not play nice on the smallest part of the boot so I used a zip tie. Make sure the bigger clamp is used for the main seal of the boot near the joint. That is most important after all. Glue everything, dry, and put the provided grease at the joint. Then pull the boot over the joint/axle. Lock the strap over it and done. Someone gave a 1 star because it did not fit after gluing but his picture showed he did NOT cut off the smallest part of the top of the boot. I had to do this to get a flush fit otherwise it was not flexing properly. Will follow up if I need to redo the job since my glue failure but my mistake after all. Took the tire off to have more space to work on the car but used two jack stands.
O**R
NOT universal
After having watched a British gentleman use this product to repair a car from the same manufacturer as mine, I decided to take a shot.Bad decision. I was meticulous and took my time. However, this boot did not properly fit either end. The enclosed clamps look great in theory. In practice, not so much. There was no way to lock the clamp in place, snap the protrusions into place and not have it slip without needing more than 2 hands. Also, with there being no channel lip at the larger end, the clamp consistently slipped off the boot. I tried using standard screw clamps, but again the lack of a channel to secure was desperately needed. Eventually a zip tie was secured, but I am not confident it will hold for long. This car is not a daily driver and will almost never see wet conditions, but I am expecting a larger repair bill for the entire replacement of both drive shafts.One bright spot is the strength of the glue bond. It sets up quickly and has tremendous strength. Too bad the rest of the process and product don’t live up to that standard.
C**S
Not Bad for a Universal Part
I have installed Bailcast CVS18 over the inner right CV joint on a 2009 FWD Nissan Murano. Initially, I was confused with the "Trilobe Fitment" instructions. I thought, I needed to remove the "Trilobe Component" from the supplied boot. Since it wasn't there, I thought, I was sent the wrong boot or a defective one.Eventually, I figured out, it was necessary to leave behind the last "rung" of the old boot and stretch the new boot over it. This remnant of the old boot functions as an adapter. I had difficulty installing the provided clamp on this end of the boot, i.e., the large end. It wasn't possible to get any pliers in an oblique position, due to the close clearance. You are right up against the differential. Ultimately, I broke the provided clamp.In lieu of the provided clamp, I used two Harbor Freight stainless steel cable ties. One alone, was not long enough. I'm not confident this will hold. The strength and tightness of the cable ties appears to be lacking. The improvised nature of the trilobe fitment doesn't appear very stable. I can see the whole thing slipping off.This vehicle is not on the road yet, due to other repairs in progress. So, any advice would be greatly appreciated.The provided clamp on the small end didn't work out either. I couldn't get it small enough. There I used one of the same stainless steel cable ties. I'm confident it will hold.The only modification I made to the boot was cutting off one rung at the small end. The gluing worked great as per the video. I allowed it to dry overnight before stretching the boot in place. I was surprised how elastic the boot was; it was easy to maneuver into place. Prior to stretching the boot in place, I inserted the provide grease into the CV joint with a disposable syringe.The only place the old boot was damaged was at the small end, i.e., a complete circular separation. I think, should I encounter the same circumstances again. I would leave the entire boot in place, except for the small separated piece and stretch the new one over it.Regardless, great video! Your help is truly appreciated.
H**C
Big $$ save for 15 minutes of work
Originally, I was skeptical about it. But it's either I spend $650 to let my mechanic replace the CV boot plus shaft or $20 replacing the boot only on my own. After checking out several Y-video, I thought, yes i can do this. Got the wheel off and the broken boot was clearly visible and accessible. This CVS-18 boot is thick, good quality. I start glue it on from the small end, one section at a time. Amazingly, the glue held with just two minutes holding it together. Complete everything in 15 minutes. You need a special tool to secure the clamp-Ear clamp piler. Amazon has it. Harbor freight has it. It's cheap, $10-$20. If it just holds for one year, I'm happy. I'm ok saving $600 by fixing something really easy for 15 minutes. Be warned, wear gloves. The grease is hard to wash off.
Trustpilot
4 days ago
3 weeks ago